How To Apply Concealer: A Stepwise Guide

Concealer is a makeup essential that can transform your complexion, covering imperfections and brightening your face. Whether you’re looking to hide dark circles or blemishes, or just want to achieve a flawless finish, knowing where to apply concealer and how to apply concealer correctly is key. This guide will walk you through the steps to using concealer effectively, with tips tailored for different concerns like dark circles and blemishes. Read ahead to know more about how to make your concealer work its magic.
Steps On How To Use Concealer
-
Step 1: Prep Your Skin
Before applying any makeup, it’s crucial to start with a clean, moisturised face. Cleansing removes dirt and oil, while moisturising ensures your skin is hydrated, which helps the concealer glide on smoothly and prevents it from settling into fine lines or dry patches. If you’re applying makeup in the morning, don’t forget to apply sunscreen with broad-spectrum SPF.
Tip: For an extra smooth application, use a primer after moisturising. This will create a smooth base and help your concealer last longer.
-
Step 2: Choose The Right Concealer
The type of concealer you choose depends on what you’re trying to achieve. A creamy, full-coverage concealer is ideal for covering blemishes, while a lighter, hydrating formula works well for the under-eye area. Before using concealer, pick a shade that matches your skin tone or is slightly lighter for brightening purposes.
-
Step 3: Apply Foundation (Optional)
If you’re applying foundation, use it before using concealer. The foundation helps to even out your skin tone and reduces the amount of concealer you need, which can prevent your makeup from looking heavy or cakey. However, if you’re going for a more natural look, you can skip the makeup foundation and go straight to concealer.
-
Step 4: Apply Concealer Under Your Eyes
Dark circles can make you look tired, but using concealer can help brighten your under-eye area and give you a refreshed look. Here’s how to apply it:
1. Dot The Concealer: Using the applicator or your finger, dot the concealer in a triangular shape under your eyes. The base of the triangle should be along your lower lash line, and the point should extend toward your cheek.
2. Blend: Use a damp makeup sponge, brush, or finger to blend the concealer into your skin, making sure to blend it outwards towards your temples and downwards toward your cheeks. Be gentle to avoid tugging on the delicate skin around your eyes.
3. Set With Powder: To prevent creasing, lightly set the concealer with a translucent powder using a small, fluffy brush. This will also help the concealer last longer throughout the day. -
Step 5: Conceal Blemishes and Redness
Concealing blemishes requires a different approach to ensure full coverage and a natural finish. Follow these steps:
1. Spot Apply: Dab a small amount of concealer directly onto the blemish using a clean brush or your finger. Make sure the shade matches your skin tone exactly.
2. Pat and Blend: Gently pat the concealer into the skin, blending the edges so it seamlessly blends with your foundation or natural skin. Avoid rubbing, as this can move the concealer and reduce coverage.
3. Build If Needed: If the blemish is still visible, apply another thin layer of concealer, patting it in until you achieve the desired coverage.
4. Set With Powder: To ensure your concealer stays in place, set it with a bit of setting powder. This also helps to reduce any shine and makes the coverage last longer. -
Step 6: Highlight and Contour
Concealer can also be used to highlight and contour, adding dimension to your face:
1. Highlighting: Use a concealer one to two shades lighter than your skin tone. Apply it to the high points of your face, such as the tops of your cheekbones, the bridge of your nose, the centre of your forehead, and your chin. Blend it out with a damp sponge or brush for a natural glow.
2. Contouring: Use a concealer two to three shades darker than your skin tone to contour. Apply it to the hollows of your cheeks, along your jawline, and the sides of your nose. Blend well to avoid harsh lines, creating subtle shadows that define your features. -
Step 7: Final Blending and Setting
Once you’ve applied and blended all your concealer, take a final look in natural light to ensure everything is seamless. If needed, blend out any harsh lines or excess product. Finish by setting your entire face with a light dusting of translucent powder, focusing on areas where you applied concealer. This will lock everything in place and prevent creasing or fading throughout the day.
Tip: If you have dry skin, go easy on the powder, as too much can make your skin look cakey or emphasise dryness.
Tip: When highlighting and contouring, always blend the edges to ensure a smooth transition between the different shades.
Using concealer might seem like a simple step, but when done correctly, it can make a significant difference in your makeup look. By following these steps and tips, you can effectively cover dark circles and blemishes, and even enhance your facial features with highlighting and contouring. Remember, the key to a flawless finish is blending and choosing the right products for your skin type and concerns. Browse through a wide range of Lancôme makeup concealers, master the art of concealer application and achieve a naturally beautiful complexion every time. You can head to the virtual makeup try-on tool to find your perfect concealer shade in seconds, from the comfort of your home, without having to spend a penny.
Explore Lancôme Makeup Products
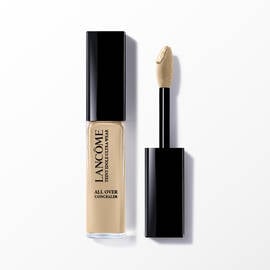
Teint Idôle Ultra Wear All Over Concealer
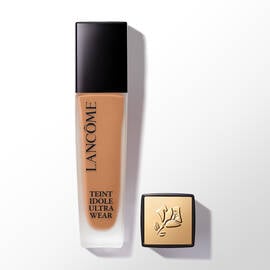
Teint Idôle Ultra Wear Waterproof Foundation

Teint Idôle Ultra Wear Compact Powder Foundation


Lash Idôle 24-Hour Waterproof Mascara